|   HOME   |   PILATES   |   FOOD   |   FITNESS   |   HEALTH   |   MY STORY   |

Saturday, October 31, 2015

CHICKEN & NOODLE ASIAN SOUP


This recipe is adapted from Annabel Langbein's recipe 'Mushroom & Chicken Tom Yum'.  Langbein is a free-range cook and makes the most delicious meals using fresh and sustainable ingredients. What I love about this soup is that the broth is created without using any stock, so no sneaky salt is added. I love poaching chicken, as it is also much more tender than pan-fried chicken. A very simple soup loaded with protein and lots of vegetables. 

Ingredients

  • 400g chicken breast, preferably free range, thinly sliced evenly
  • 1 star anise 
  • 1/2 - 1 teaspoon chilli flakes
  • the juice & zest of 1 lime
  • 2 tablespoons soy sauce
  • 1 tablespoon fish sauce
  • 1 teaspoon sesame oil
  • 1 garlic clove, finely chopped
  • 2 tablespoons tomato paste
  • 200g whole mushrooms, quartered
  • 3 medium tomatoes (around 400g), diced
  • 1 bunch pak choy, chopped
  • 1 broccoli head, cut into even-sized florets and stalk chopped
  • 90g soba noodles or 100g rice vermicelli noodles
  • Optional - 1 spring onion, finely chopped, to serve 

Cooking 

1. Place the chicken breast in a large saucepan and cover completely with water (you will need around 9-10 cups to achieve this). Add the star anise, chilli, juice & zest of the lime, soy sauce, fish sauce, oil garlic and tomato paste and stir to combine. Bring to the boil over high heat, covered. Once boiled, simmer for 5 minutes, covered, then remove the chicken breast from the pan and leave to rest for at least 5 minutes. Discard the star anise. 

2. Change the stove to medium-high heat and add the mushrooms, tomatoes, pak choy and broccoli to the broth. Cook, covered, for 4 minutes, then add the noodles to the pan and stir well for 1-2 minutes or until the noodles are tender. Remove from the heat and add a generous amount of ground black pepper. Thinly slice the cooked chicken breast and add it to the broth. 

Divide the soup into 4 bowls and add spring onion, if desired. 

Serves /
Total Preparation time / max 15 minutes 
Total Cooking time / max 25 minutes 


x Emily 

Thursday, October 29, 2015

TURKEY & VEGETABLE PIZZA


In addition to being quite healthy, I think that making miniature pizzas is rather fun! You can add any ingredients that you know to be healthy and low-fat (for example chorizo would not make the list, but mushrooms and tomatoes would), chop them up and bake them for 10-12 minutes. Just remember that when it comes to pizza, less toppings is always more! Coeliacs could substitute pita bread for a gluten-free wrap as a base or a small gluten-free pizza base. Vegetarians can omit the turkey and add more vegetables. If you are making this dish after a long, draining day at work and don’t feel like being creative, use my combination of  toppings, as they are delicious. Be mindful that portion sizes are very important, therefore try to stop yourself at ONE pizza. 

INGREDIENTS
  • baking paper
  • 2 tablespoons tomato paste 
  • 4 small whole wheat pita breads (45g each) 
  • 120g sliced turkey, roughly shredded
  • 60-80g red onion, finely diced
  • 1 small red capsicum, finely diced
  • 1 x 400g tin of artichokes, rinsed, drained & roughly chopped 
  • 1 teaspoon of reduced-fat grated cheese for each pita bread 
  • 2 teaspoons dried oregano or 1 tablespoon fresh oregano, finely chopped 

COOKING 

1. Preheat oven to 200 degrees celsius fan-forced. Line a large oven tray with baking paper. 

2. Spread a thin layer of tomato paste over each of the pita breads. Then evenly distribute the turkey, red onion, capsicum and artichokes to each pita bread. Top with cheese and oregano. 

3. Bake in the oven for around 10-12 minutes or until the base browns to your liking. 

Serves / 4  / 1 pita pizza per serving 
Total Preparation time / max 10 minutes 
Total Cooking time / around 15 minutes 


x Emily 

Wednesday, October 28, 2015

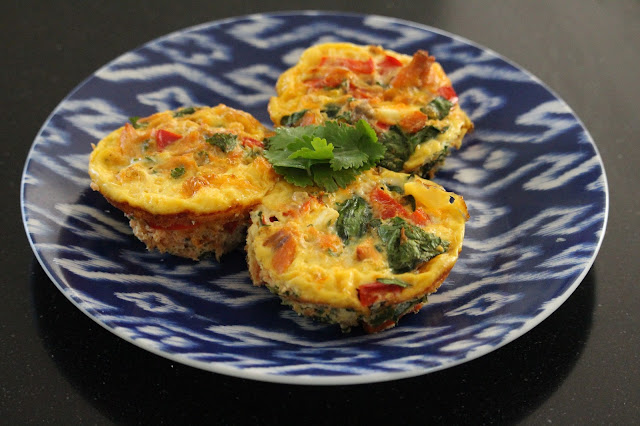
SALMON and VEGETABLE MUFFINS


I've finally found a way for myself to enjoy salmon! I really hate that I cannot stand salmon fillets, as I know how healthy they are for me. After eating red salmon in a sandwich that a lovely friend's mum made for me a while back, I realised that I didn't mind salmon in a tin! I figure that if I start eating salmon in these muffins I will be able to gradually work my way towards salmon fillets! I eat these with a side salad for a light dinner. You can top the muffins with extra herbs and a dollop of reduced-fat sour cream, if desired. 

INGREDIENTS

  • extra virgin olive oil spray or 2 teaspoons extra virgin olive oil
  • 4 eggs, preferably free-range
  • 1 can (210g) red salmon, drained, flaked & any bones removed
  • 1/4 cup reduced fat cows milk (or if intolerant/allergic to dairy substitute for lactose-free, soy or unsweetened almond milk)
  • 1/4 cup water 
  • 1/2 red or green capsicum, deseed and finely chopped
  • a generous handful of baby spinach, chopped
  • a small handful of dill and / or parsley, finely chopped
  • 30g reduced fat feta, crumbled
  • a generous amount of ground black pepper


COOKING 

1. Preheat a fan forced oven to 180 degrees. Spray or brush all holes of a 12 standard muffin tray. 

2. Whisk the eggs in a medium bowl, then add the salmon, milk, water, capsicum, spinach, herb/s, feta and pepper. Mix well to combine and add more water if the mixture is too thick for your liking. 

3. Pour the salmon & egg mixture into the prepared muffin holes. I like to make big muffins, therefore I usually make around 9 muffins. If you want to make 12 muffins, pour a little less into each muffin hole. 

4. Bake for around 25 minutes or until egg is just set and golden. Remove warm, topped with extra herbs, if desired. 

Makes /
Total Preparation time / under 15 minutes 
Total Cooking time / 25 minutes 

x Emily 
Tuesday, October 27, 2015

BROWN RICE, CHICKEN & CHINESE BROCCOLI


This is a very simple dish, inspired by my husband saying that he wanted 'chicken, brown rice and broccoli' for dinner. I had bought some Gai Lan (Chinese broccoli) from a farmers market on the weekend which I absolutely love with oyster sauce and soy sauce. Gai lan has thick green stems and dark green leaves, both of which can be eaten. You can certainly fry the chicken breast with 1 teaspoon extra virgin olive oil or sesame oil and 1 finely chopped garlic clove, however I prefer poaching chicken as it uses no oil and does not dry out, hence this is the method I used in the recipe below. 

INGREDIENTS
  • 2 chicken breasts, even in size (around 450-500g in total)
  • 1 large garlic clove, peeled & sliced 
  • 1 tablespoon soy sauce
  • 1 cup brown rice
  • 1 head of broccoli, florets and stalk chopped into even pieces
  • 1 bunch of Gai lan (Chinese broccoli), ends of stalks removed (these are too tough to eat) and stalks and leaves separated 
  • Optional - 1/4 cup green shallots, finely chopped, to serve 
Sauce
  • 2 tablespoons oyster sauce
  • 1 tablespoon soy sauce
  • 1 tablespoon lime juice
  • 1 tablespoon sushi vinegar or mirin
  • 1 teaspoon sesame oil

COOKING 

1. Fill a medium saucepan halfway with water, add the chicken breasts, garlic and soy sauce. Bring to the boil, covered, then simmer for 10 minutes. After this time turn off the stove and leave the chicken to sit for 5 minutes, before removing the chicken and placing it on a chopping board to cool for 5 minutes before shredding it. 

2. Meanwhile, add the brown rice to another medium or small saucepan with 2 cups of water and bring to the boil, covered. Reduce to a simmer, still covered, and cook for 15-18 minutes or until the rice is tender and the water has been absorbed. 

3. Prepare the sauce by combining all the ingredients in a small bowl or cup/mug. Add a few tablespoons of water to thin out the sauce and stir vigorously to remove any lumps. 

4. In a third saucepan (or if not available wait until the chicken or rice is finished to use that saucepan), fill with around 10cm of water and bring to the boil, covered. Once boiled add the gai lan stalks and the broccoli, as these take longer to cook than the leaves. When the stems have become bright green, or have been cooking for 2 minutes, add the leaves to the water and cook for 1-2 minutes or until the leaves are wilted. Remove from heat and drain the vegetables until cold water in a colander. Roughly chop the gai lan leaves. 

Combine the chicken, rice, sauce and vegetables in a large serving bowl, stirring well. Divide into 4 serving bowls and top with finely chopped green shallots, if desired. 

Serves / 4
Total Preparation time / 10 minutes 
Total Cooking time / around 30 minutes 

x Emily 


Monday, October 26, 2015

WARM STEAK SALAD SANDWICH


This steak salad sandwich idea came about whilst I was browsing an issue of Super Food Ideas several years ago. I love the idea that a steak sandwich can become a salad and can be eaten at dinner time without any judgement. If you are not prepared to cook your own beetroot do not use the tinned beetroot as there is so much sugar in those slices! I've listed how to cook the beetroot to make it easy, however if in a rush leave it out or cook it before that night; for example I roasted my beetroot on Sunday and used it on Tuesday. Roasting a beetroot is so simple: you let the oven do the work for 25-30 minutes and you can use this time to get the salad ready. 

INGREDIENTS

  • 1 medium beetroot, peeled, ends trimmed and cut into half 
  • 1 teaspoon extra virgin olive oil
  • 400g lean eye fillet steak, cut into small even strips
  • a generous handful of baby spinach leaves and/or mixed lettuce leaves, washed and drained
  • 2 large tomatoes, washed and cut into wedges
  • 1/2 a continental cucumber, cut into slices 
  • 1 ripe avocado, cut into small pieces
  • 2 slices of wholemeal or multigrain bread (or gluten-free if intolerant), toasted and torn into little pieces
  • 30g of grated reduced-fat cheese 

Dressing
  • 1 small garlic clove, finely chopped or crushed
  • 2 tablespoons lemon juice
  • 1 tablespoon dijon mustard
  • 1 teaspoon extra virgin olive oil 
  • 2 tablespoons water 
  • ground black pepper

COOKING 

1. *NB: Skip this step if you are not using beetroot. 
Preheat a fan-forced oven to 200 degrees celsius and wrap the beetroot halves in foil. Cook for 25-30 minutes or until beetroot is tender (that is, you can slice the beetroot with a knife easily). Remove from oven and leave to cool for 5 minutes, then slice beetroot into thin wedges. 

2. *Either perform this step once the beetroot has just been removed from the oven or start with this step. 
Heat a medium frying pan over low-medium heat, adding the oil and swirling to coat. When the pan is hot add the beef and cook, tossing often, for around 5 minutes or until the beef is cooked & browned to your liking. Remove from heat. 

3. Whilst the beetroot and/or beef is cooking, make the dressing by combining all the ingredients and stirring well. 

2. Combine the baby spinach/lettuce, tomatoes, cucumber, avocado, torn bread pieces, cheese and cooked beetroot in a large serving bowl. Add cooked beef to the bowl and toss well to combine. Drizzle the dressing over the top and serve. 

Serves / 4 
Total Preparation & Cooking time / around 40 minutes if cooking the beetroot / less if not 

x Emily 

Sunday, October 25, 2015

HOMEMADE HUMMUS


I greatly enjoy making dips myself, as I then know exactly what ingredients go into them. Store bought Hummus can often be disguised as a healthy dip, but the huge quantities of oil and preservatives added to it can be very scary. In addition dips always taste so much better when they are made out of your own kitchen. This is one of my go-to dips when I have friends coming over or when I am asked to bring snacks somewhere. 

Ingredients
  • 400g tin of chickpeas, rinsed and drained 
  • 2 garlic cloves, crushed or finely chopped
  • 1 teaspoon tahini paste 
  • 1 teaspoon ground cumin
  • 1 teaspoon ground coriander 
  • the juice of 1/2 a small lemon
  • 2-3 tablespoons extra virgin olive oil 
  • Optional - 1 tablespoon fresh parsley, finely chopped, plus extra to serve 

Preparation

1. Place all the ingredients except for the oil in a blender or food processor and blend/process for a few minutes or until all the ingredients are combined. You may need to stop the machine a few times to scrape the mixture from the sides so that it all mixes evenly. Slowly pour in the oil whilst the blender/processor stays on. If the hummus is not smooth in consistency after adding 2 tablespoons olive oil you may add a 3rd and/or add more lemon juice. 

Serve the hummus alongside sliced raw vegetables, such as carrot, capsicum, celery, cucumber, zucchini, etc. 


Saturday, October 24, 2015

TURKEY & POTATO SALAD


Summer has almost come to Brisbane! Time to crowd the beaches, work on our tans and host Sunday afternoon bbq’s.  Time, as well, for many of us to change our palates. I don’t know about you, but if the temperature outside is above 30 degrees, I cannot stomach hot food very well. All my meals have to be refrigerated and take on the form of ‘salads’. Simple to prepare, this turkey & potato salad would make an excellent dish for a lazy bbq on a Sunday afternoon.

INGREDIENTS 

  • 550g (1 large) sweet potato, peeled and cut into 3cm pieces
  • 2 teaspoons extra virgin olive oil
  • 1 large garlic clove, finely chopped
  • 400g turkey breast/fillet, cut into even 3-4cm pieces
  • 1/2 teaspoon ground paprika
  • the juice of 1 lemon 
  • 150g pickles, roughly chopped 
  • 1-2 handful/s of fresh spring onions, chives, parsley and/or coriander, finely chopped 
  • 40g reduced-fat feta, crumbled

COOKING 

1. Place the potatoes in a medium saucepan half filled with water and bring to the boil. Boil for around 10 minutes or until potatoes are tender but not mushy. Drain well in a colander over cold running water. 

2. Whilst the potatoes are cooling, heat 1 teaspoon oil in a medium to large frying pan over medium heat and add the garlic. Stir for 1-2 minutes or until garlic is fragrant, then add the turkey. Cook, stirring often for around 6 minutes or until all pieces are coloured and no pink flesh remains. Turn off the heat and leave the turkey in the pan, covered, to rest for 5 minutes. 

3. Stir the remaining teaspoon of oil, lemon juice, ground paprika and a splash of water in a small bowl or cup. 

4. Place the potato in a large serving bowl and add the turkey, pickles, fresh herb/s, feta and a generous pinch of ground black pepper. Drizzle the dressing from step 3 over the top and divide into four bowls. 

Serves /
Total Preparation time / 15 minutes 
Total Cooking time / 25 minutes 


x Emily 

Tuesday, October 20, 2015

PUMPKIN MASH


Pumpkin is my vegetable of choice for autumn and winter.  Not only do I adore the bright colour, I love the taste and the versatility of this humble vegetable. Just add a few simple ingredients to pumpkin and you’ve got yourself a filling and satisfying dish. I recently looked into the nutritional composition of this orange beauty and realised just how good this vegetable is for you...

·      Pumpkin has a super high carotenoid content, which assists in deterring premature aging, cardiovascular problems and other infections. Carotenoids are also high in Lutein and Zeaxanthin, minerals which protect the eyes and inhibit the formation of cataracts and deterioration of the eye tissue. 
·      Pepitas, or the seeds in the pumpkin, are a fantastic source of protein. Just one ounce or 29 grams of pepitas contains a massive 7 grams of protein.
·      Pumpkin flesh and seeds are rich sources of Vitamin A, which does wonders for boosting your immune system and improving the condition of your eyes.
·      Pumpkin contains a considerable amount of Vitamin C, which is proven to attack several forms of cancer as well as increasing the body’s immunity and fighting free radicals.
·      Pumpkin seeds are filled to the brim with essential fatty acids, which offer protection against common health diseases including arthritis, cancer and high blood pressure. Fatty acids also increase brain power and encourage healthy skin.
·      Fibre can sometimes be a tough ingredient to incorporate into your daily diet. Luckily, pumpkin has plentiful amounts of good dietary fibre, which assists in lowering bad cholesterol levels in the blood as well as helping to regulate blood sugar levels. Pumpkin flesh is a very effective remedy for gastro illnesses such as indigestion and constipation.
·      Pumpkin is also choc-full of Zinc & Potassium. Zinc is essential for improving bone density as well as boosting the immune system and keeping the reproductive system healthy. A diet filled with Potassium can reduce the onset of hypertension and cardiovascular diseases.
·      Pumpkin flesh and pumpkin seeds are loaded with the mineral magnesium, which is involved in the maintenance of muscles, bones and teeth as well as many other biological functions. 


INGREDIENTS
  • 750g pumpkin, (approximately 1/2 a butternut pumpkin) deseeded, peeled & chopped into even sized small pieces
  • 1 tablespoon extra virgin olive oil
  • 1 large garlic clove, finely chopped or crushed 
  • 1/2 cup reduced fat cows milk (or if dairy intolerant / allergic try soy, lactose-free or unsweetened almond milk) 
  • 1 tablespoon ground sage and/or 1 tablespoon fresh sage, finely chopped

COOKING 


1. Place the pumpkin pieces on a large heatproof plate and cover with glad wrap. Microwave on high for 5 minutes or until pumpkin is soft. Alternatively, if you do not have a microwave, steam the pumpkin in a saucepan with water just covering the pumpkin for around 5 minutes. 

2. Heat the oil in a medium saucepan over medium-high heat and swirl to coat the pan. Add the garlic to the pan and cook for 1 minute. Add the softened pumpkin to the pan and cook, stirring frequently, for 2 minutes or until very soft. Add the sage and the almond milk, one 1/4 cup at a time, mashing and stirring until the milk has been absorbed and the pumpkin is smooth. Remove from heat and season with ground black pepper. Serve warm. 

Serves / 4 as a side  
Total Preparation time / 5 minutes  
Total Cooking time / around 10 minutes 


x Emily 

Monday, October 19, 2015

BAKED SEA PERCH with STEAMED BROCCOLI & SWEET POTATO FRIES


I was very lucky to be given several Sea Perch fillets from my father-in-law, who caught them fishing up in Northern QLD earlier this year. Sea Perch is often called Red Emperor, however it is not a true Emperor fish. As I am not an avid fish eater but have decided to become, due to the numerous health benefits fish provides, I did some extensive research regarding how to cook fish before diving in. I chose baking the fish as apposed to grilling or pan frying, as it seemed a better way to keep the moisture in the fish. I was surprised to learn that Sea Perch is one of Australia's most highly regarded fish...lucky I have a whole freezer full of them! 


INGREDIENTS

Baked Fish 
  • the juice of half a lemon
  • the juice of half a lime (or the juice of 1 lemon or 1 lime)
  • 1 large garlic clove, finely chopped or crushed
  • 1/2 teaspoon chilli flakes
  • 1/4 cup fresh parsley, finely chopped
  • 2 sea perch fillets, skinned
  • al foil 
  • 1 tablespoon extra virgin olive oil 
  • shallow oven tray or baking dish 
Sides
  • 1 medium sweet potato, washed, peeled & cut into thin even wedges
  • 1 teaspoon extra virgin olive oil 
  • 1/2 teaspoon ground coriander
  • 1/2 teaspoon ground cumin
  • 1 head of broccoli, separated into florets and stalk chopped


COOKING 

1. Preheat a fan-forced oven to 180 degrees celsius. Toss the sweet potato wedges with the oil and spices, then place on a lined baking tray. Place at the very top of the oven and cook for 20-25 minutes or until fries are lightly browned and cooked to your liking. Remove from heat. 

2. Combine the lemon and/or lime, garlic, chilli and parsley in a small bowl, mixing well. 

2. Place the fish in separate al foil, then brush the oil over the front and back of the fish fillets. Pour half of the marinade over the top of each fillet and wrap the fish like a parcel in the foil. 

3. When the fries have been in the oven for 15 minutes, bake the fish in the oven in a shallow tray or baking dish for 10-12 minutes, using a knife to see if the fish is cooked (if it is cooked, the fillet will flake slightly when the knife enters). Remove from the oven. 

4. When the fish has been placed in the oven, bring a small saucepan to the boil over high heat, covered. Remove the lid and place a sieve or colander in place of the lid with the broccoli florets & stalks inside. Steam for 4-5 minutes or until just tender. Remove from heat and toss with ground black pepper. 

Serve fish alongside 1/2 of the steamed broccoli and 1/2 of the sweet potato fries. 

Serves / 2
Total Preparation time & Cooking time / around 35 minutes  

x Emily 

Sunday, October 18, 2015

BEETROOT DIP with SPICES


There is nothing tastier than homemade dip. Supermarket processed guacamole, hummus and tzatziki pale in comparison. I have wanted to make my own beetroot dip for a long time as being Russian beetroot is one of my major food groups. Adding the ground cumin and coriander added a beautiful depth to the dip. You can use any spices you like for making beetroot dip, but lemon juice and yoghurt are a must. 


INGREDIENTS

  • 1 large fresh beetroot, peeled & cut in half 
  • 1 large garlic clove, finely chopped
  • 1 teaspoon ground cumin
  • 1 teaspoon ground coriander
  • 1/2 cup 99% fat free natural yoghurt
  • 2 tablespoons fresh lemon juice 

COOKING 


1. Preheat fan-forced oven to 200 degrees celsius and wrap the beetroot halves in foil. Cook for 25-30 minutes or until beetroot is tender (that is, you can slice the beetroot with a knife easily). Remove from oven and leave to cool for 5-10 minutes, then slice beetroot into small pieces.

2. Meanwhile, dry fry the garlic in a small frying pan (That is, do not add any oil to the pan) for 2 minutes or until garlic is fragrant. Remove from heat. 

3. Place beetroot pieces, garlic, cumin, coriander, lemon juice and yoghurt in a blender or food processor. Blend/process ingredients until smooth and no lumps of beetroot remain (this should only take 30 seconds or so). 

Serve dip with crackers. 

Serve as a snack
Total Preparation time / 10 minutes 
Total Cooking time / 45 minutes 


x E

BAKED ZUCCHINI CHIPS


I’ve finally found a way to cook zucchini and make it taste relatively delicious to me. Being such a bland vegetable, I struggled with eating it during my childhood as it always seemed to end up on our dinner table at least three times a week, whether it was hidden in a stir-fry, roasted or baked. My theory is that if you put garlic, a little bit of oil and fresh herbs with anything, you can make it appetizing. Add a sprinkle of chilli for those that like it fiery and a once flavourless vegetable is no more!


INGREDIENTS

  • sea salt
  • 1 large zucchini, very thinly sliced into rings 
  • 1 tablespoon extra virgin olive oil 
  • 1/4 teaspoon chilli flakes (or more, depending on how hot you want it)
  • 1 large garlic clove, very finely chopped or 1/2 teaspoon garlic powder
  • 1 heaped tablespoon fresh basil, finely chopped

COOKING 

1. Lay the zucchini rings on a few paper towels in a single layer. Lightly toss salt over the zucchini and leave to sweat for a minimum of 25 minutes, then pat the zucchini dry with more paper towel to remove the salt and excess water. 

2. Preheat an oven to 180 degrees celsius. Line a large baking tray with baking paper. 

3. Combine oil, zucchini slices, chilli and garlic in a medium bowl and toss well to combine. 

4. Place the zucchini chips in a single layer on the prepared tray. Bake in the oven for around 30-35 minutes or until the chips are lightly golden. Remove from the oven and cool slightly before handling. 

Serve alone or with a sprinkle of fresh herbs! 

Serves / 2 as a side dish 
Total Preparation time / around 35 minutes (including the 25 minutes for the zucchini to 'sweat')
Total Cooking time / 35 minutes 


x Emily 

VEGETARIAN (or not) OMELETTE


Eggs are a great way to get your protein and good fat hit. I don't think of omelettes or eggs for that matter as exclusively for breakfast; they are a wonderful late night dinner idea, as they are low in carbs and full of flavour. I have always been a little apprehensive about cooking omelettes, however after several attempts over the years I am confident with my recipe below. The finished product may not look as fancy as what would appear on your plate at a cafe, but it is tasty, nutritious and simple to make. I prefer this omelette sans meat, however I do realise that will not like this, hence the optional addition of bacon or ham. Ground or smoked paprika is also optional- if this is not in your pantry just use more ground black pepper. 


INGREDIENTS
  • 1 1/2 teaspoons extra virgin olive oil 
  • 1/4 small red onion (30g), finely chopped 
  • 1/2 a small red capsicum, roughly chopped
  • 1/2 a small green capsicum, roughly chopped
  • Optional - 1/2 teaspoon ground or smoked paprika 
  • Optional- 80g bacon or 100g ham, trimmed of fat, roughly chopped
  • 4 eggs, lightly beaten
  • 1/2 cup water 
  • 2 tablespoons fresh chives, roughly chopped, plus extra, to serve 
  • ground black pepper 
  • 20g reduced-fat feta, crumbled 
  • a small handful of baby spinach 

COOKING 

1. Heat 1/2 teaspoon of oil in a medium frying pan over medium heat and cook the onion for 2 minutes or until the onion has softened. Add the capsicum and the paprika and/or meat if using and stir for 2 minutes or until well combined and the capsicum is just al dente (still slightly crunchy). If you are cooking bacon or ham this step may take slightly longer, depending on how you like your meat cooked. Remove from the pan when cooked and keep warm. 

2. Whisk the eggs, water, chives and a generous pinch of pepper in a deep bowl or jug. Heat 1/2 teaspoon of oil in a medium frying pan on low to medium heat and swirl to coat. Pour in half of the omelette mixture and leave until the egg is set around the edges; this should take around 2-3 minutes. Carefully fold one half of the omelette over the other and leave to cook for another minute or until the the omelette has just set.  Remove the omelette from the pan, place on a serving plate and add half of the capsicum mixture, topping with feta and half of the baby spinach. Repeat the cooking process with the remainder of the egg mixture. 

Serves /
Total Preparation time / max 10 minutes 
Total Cooking time / around 15 minutes 


x Emily 


Saturday, October 17, 2015

QUINOA CHICKEN RICE PAPER ROLLS


A lovely friend of mine fed these rice paper rolls to me the other weekend and I have not been able to stop thinking of them since, therefore I made my own version of them. I love the twist Collette has put on this traditional light Vietnamese meal, by adding quinoa and oven baked pumpkin to pump up the fillings. You can use skinless bbq chicken if you prefer this to poaching chicken breast and can choose to leave out the quinoa if you want to make this meal more low-carb. If you are vegetarian add the quinoa and some thinly sliced avocado. This is a such a light, fresh lunch or dinner that I can see myself making it for many, many years to come. 

Ingredients

  • baking paper 
  • 300g pumpkin, peeled, deseeded and cut into 2cm pieces 
  • 1 teaspoon extra virgin olive oil
  • 250g cooked chicken, skin removed or 250g chicken breast 
  • 1/3 cup white quinoa
  • 12 rice paper round sheets
  • 1 Lebanese cucumber, cut into thin sticks
  • 2 generous handfuls of baby spinach or green lettuce
  • 2 spring onions, finely chopped
  • Optional- 2 handfuls of fresh coriander leaves, roughly chopped
  • Dipping sauce - hoisin sauce or sweet chilli sauce 

Cooking 

1. Preheat a fan forced oven to 200 degrees celsius. Line a baking tray with baking paper. Toss the pumpkin and oil in a medium bowl to combine, then place the pumpkin in a single layer on the tray. Bake in the oven for 20 minutes or until the pumpkin is tender.

2. If you are using cooked chicken, ignore this step. If you are not using cooked chicken, you will need to poach the chicken breast. Whilst the quinoa is cooking, place the chicken breast in a small to medium saucepan. Bring to the boil, covered, then simmer for 10 minutes. Turn off the stove and let the saucepan stand, covered, for 5 minutes. Remove the poached chicken from the pan and leave to cool for a few minutes before 'shredding' the chicken (I do this with 2 forks and pull in separate directions, as you would when 'pulling' pork). Discard the poaching liquid. 

3. Rinse the quinoa thoroughly, twice, with your hands and strain through a sieve. Bring the quinoa to boil in a small to medium saucepan over high heat with 1 cup water, covered. Once boiled, lower to a simmer and continue to cook, covered, until all the water is absorbed, around 6 minutes. 

4. Once the pumpkin, chicken and quinoa are cooked, pour boiling hot water into a medium bowl. Lay the rice paper sheets next to the water. Place your cool fillings; cucumber, lettuce, shallots, coriander (if using) on a plate next to your cooked fillings. You are now ready to make your rice paper rolls! 


5. Soften each rice paper sheet by individually dipping it in the water and rotating the sheet with your fingers for one rotation only; the paper will feel moderately wet but not completely softened. The consistently of the rice paper should be pliable and slightly tacky. Have a flat surface such as a large clean plate or your bench top to place the paper. Just work with one softened rice paper sheet at a time, as it is much less fiddly. 

6. To wrap - I use the Two End Method. Centre the ingredients vertically, using 1/12 of all of the above ingredients, and position them about 4cm from the lower edge of the rice paper. Bring the lower and upper edge of the paper up towards the filling, then roll up the rice paper from one side to the other (I roll from left to right) and seal. Continue until no ingredients and no rice paper sheets remain (the ingredients should make 12 rice paper rolls comfortably). 

Serve with one of the dipping sauces mentioned and enjoy. 

Makes / 12  / Serves 4 = 3 rice paper rolls each 
Total Prep & Cooking time / around 45 minutes 


x Emily 

Wednesday, October 14, 2015

PRAWN & MANGO WRAPS


This is a light and easy meal that screams 'summer' to me. I like to buy prawns all ready to be cooked, but sometimes I do the dirty work myself; peeling, deveining and removing their tails. It's up to you which way you go. I can see myself eating a lot of these wraps over the hot months! 


INGREDIENTS
  • 250g prawns, peeled, deveined & tails removed, uncooked 
  • 1 tablespoon sweet chilli sauce 
  • 1 teaspoon extra virgin olive oil
  • 8 small tortilla wraps or mountain bread wraps 
  • a handful of mixed or green lettuce, washed and roughly shredded
  • 100g cucumber, thinly sliced into rounds
  • 1 ripe avocado, sliced thinly
  • 1 small mango, cut into cubes, around 100g 
  • Optional- a handful of fresh coriander leaves

COOKING 

1. Combine the prawns and sweet chilli sauce in a small bowl. 

2. Heat and swirl the oil in a medium fry pan over medium-low heat. Add the prawns and cook, stirring regularly, for 2 - 3 minutes or until the prawns are pink and no longer translucent. Remove from heat immediately so they do not continue to cook. 

3. Lay a wrap down flat on a plate or chopping board. Arrange 1/8 of the cooked prawns, lettuce, cucumber, avocado, mango and coriander if using in the middle of the wrap and fold to wrap. Repeat until all wraps and ingredients are used. 

Serves / 4 / 2 wraps per serving 
Total Preparation & Cooking time / max 15 minutes (this does not include prepping the prawns)


x Emily 

Tuesday, October 13, 2015

BROCCOLI with BACON & LEEK


A client gave me the idea for this dish when she told me about a meal she had made a few weekends ago, featuring broccoli, bacon, walnuts and herbs. You can add any herbs you like to this dish; I just kept it nice and simple as I was (and am) running a few minutes behind today! If you do not eat meat, replace the bacon with 3 hardboiled eggs for your protein. 

Ingredients
  • 1 head of broccoli, stalk & florets chopped into even pieces
  • 1/4 cup almonds, halved 
  • 1 tablespoon extra virgin olive oil
  • 1/2 a leek, white part only, finely chopped
  • 100g bacon, fat removed and chopped into even pieces 
  • paper towel
  • 30g reduced-fat feta, crumbled 
  • ground black pepper

Cooking 

1. Bring a small to medium saucepan filled 1/4 with water to the boil, covered. Once boiled, remove the lid and replace with the broccoli in a small colander or sieve, then cover with the lid. Leave to steam for around 4-5 minutes, then check to see if the broccoli is tender by placing a fork into a stalk. If the fork slides in with just a little bit of resistance, the broccoli is tender but not mushy. Remove the colander or sieve with the broccoli and discard the pan. 

2. Meanwhile, dry fry the almonds in a medium fry pan over medium-low heat for just 2 minutes or until the nuts are fragrant but not burnt. Remove from heat. 

3. Using the fry pan from step 2, swirl the oil to coat the pan over meidum heat. Add the leek to the pan and cook for 2 minutes, stirring often. Remove the leek from the pan and add the bacon to the pan, covering with a lid. Cook for around 2-4 or until the bacon is cooked to your liking. Remove the bacon from the stove and pat the excess oil out of the meat with a few paper towels. 

4. Toss the broccoli, almonds, leek, bacon, feta and a generous pinch of pepper in a large serving bowl. 

Serves /
Total Preparation time / 10 minutes
Total Cooking time / around 10 minutes 

x Emily 

Monday, October 12, 2015

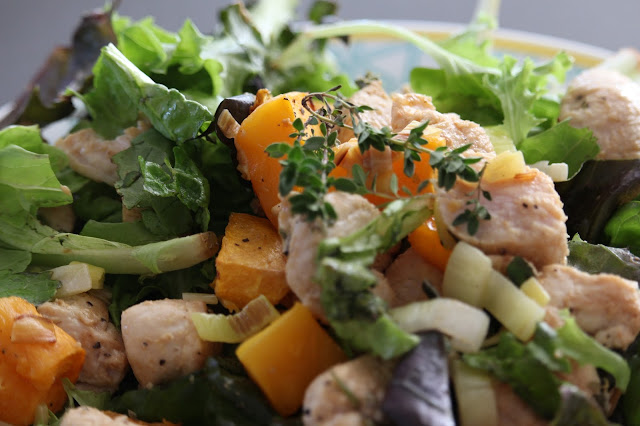
THYME TURKEY with ROAST PUMPKIN


I love cooking with turkey as I actually like the taste more than chicken. I found a wonderful butcher at Greenslopes- Rock N Roll Butcher- that sells turkey steaks at a very reasonable price. This meal was created as I was walking my big kelpie; I tend to get my best cooking ideas when I am walking him, so we walk together everyday! 

Ingredients

  • baking paper 
  • 450g turkey steak, fat removed and cut into even pieces
  • 1 heaped tablespoon dijon mustard
  • 1 heaped tablespoon lemon thyme or thyme leaves, fresh or dried, stems discarded 
  • 1 tablespoon apple cider vinegar
  • 3 teaspoons extra virgin olive oil 
  • 400g pumpkin, deseeded, peeled and chopped into even 3cm pieces
  • 1 tablespoon maple syrup
  • a generous pinch of ground black pepper
  • 1/2 a leek, white part only, finely chopped
  • 4 handfuls of mixed lettuce, washed and roughly torn/chopped 

Cooking 

1. Preheat a fan forced oven to 220 degrees celsius. Line a medium to large baking tray with baking paper. 

2. Combine the turkey, mustard, thyme, vinegar and 1 teaspoon oil in a medium bowl, stirring well. Refrigerate for 10 minutes. 

3. Once the turkey is marinating, toss 1 teaspoon oil, pumpkin pieces, maple syrup and pepper in a medium bowl. Place in a single layer on the prepared baking tray and bake in the oven for 20-25 minutes or until the pumpkin is tender and / or just starting to become golden. 

4. Once the turkey had marinated for 8 minutes, heat the remaining 1 teaspoon of oil in a medium frypan over medium-low heat and swirl to coat the pan. Add the leek and cook for 2 minutes or until fragrant and just starting to become golden. Remove from heat and add the turkey to the pan, keeping the heat over medium-low. Cook the turkey for 4 minutes, stirring often, then turn off the heat, cover the pan and leave the turkey to sit in the pan for 5 minutes. After this time pick the biggest few pieces of turkey and cut them in half, checking that the turkey is white and no longer pink. If it is still slightly pink, cook for another minute. 

5. Toss the cooked turkey, leek, pumpkin and lettuce in a large serving bowl. Serve with extra thyme leaves, if desired. 

Serves /
Total Preparation & Cooking time / around 40 minutes 

x Emily 

Thursday, October 8, 2015

TOFU, QUINOA & GREEN SALAD


This recipe came from a Japanese cookbook, from a recipe titled "Millet & Tofu Salad". My creativity ran wild with this recipe and I ended up keeping just one of the original ingredients: tofu! This goes to show how deviating from the exact instructions and ingredients of a recipe is absolutely fine to do and I expect readers to do the same with my recipes! To me, cooking is fluid and everything can be fixed, like painting. You just have to own the ingredients and the methods you choose. Anyways, tofu has recently become a wonderful source of protein for me, as I am not an avid meat eater. I hope you like the dish (and if you don't, change it!). 

Ingredients

Salad 

  • 300g firm tofu, halved 
  • 1 cup quinoa 
  • 2 teaspoons extra virgin olive oil 
  • paper towel
  • 1 medium green capsicum (around 250g), seeded removed & thinly sliced
  • 150g green beans, trimmed and cut in half
  • 2 spring onions, thinly sliced
  • 1/4 cup almonds, halved
Dressing
  • a generous pinch of ground black pepper
  • 1 heaped tablespoon dijon mustard
  • 1 tablespoon apple cider vinegar
  • 2 tablespoons water (or more, if you want the dressing thinner)

Cooking 

1. Place the halved tofu between two chopping boards or plates with a weight on top (I used a jar of nuts). Raise one end (I placed a small scale underneath one side of the chopping board) and sit for 25 minutes. 

2. Meanwhile, rinse the quinoa thoroughly, twice, with your hands and strain through a sieve. Bring the quinoa to boil in a medium saucepan over high heat with 2 and a 1/2 cups of water, covered. Once boiled, lower to a simmer and continue to cook, covered, until all the water is absorbed, around 10-12 minutes. 

3. Whilst the tofu is sitting and the quinoa is cooking, heat a small saucepan over medium-low heat and dry fry the halved almonds (meaning without using any oil). When the almonds are fragrant and the inside of the almonds are very slightly golden, remove from the heat, as they will continue to brown as they sit. 

4. Make the dressing by combining all of the ingredients in a small bowl or mug and stirring well until no lumps of mustard remain. 

5. Once the tofu has sat for 25 minutes, chop into slim, even strips. Heat 1 teaspoon olive oil in a medium pan over medium heat, swirling to coat. Add the tofu strips and cover the pan. Cook for around 3 minutes on each side or until the tofu is lightly browned. Remove from the heat and place on a few paper towels, then pat with another few paper towels to remove the excess oil. Repeat this process, adding another teaspoon of oil, until all tofu is cooked. Remove the tofu from the heat and leave to cook on the paper towel. 

6. Change the heat to low and add the sliced capsicum, green beans and spring onions and cook, uncovered, stirring, for 2 minutes or until the spring onions are very fragrant. 

Serves /
Total Prep & Cooking time / around 45 minutes (including the tofu resting time)


x Emily 

Tuesday, October 6, 2015

GYOZA / JAPANESE DUMPLINGS


Gyoza are a favourite dish of my husbands'; he asks for them frequently. They require patience and time so I don't make them too often for him (and I don't want him to get too used to them!). My dumplings are nowhere near as expertly folded or presented as what you would receive at a Japanese restaurant, however the way I fold my gyoza is less fiddly and works well for me! Ps please note that wonton wrappers are not gluten-free and that different wonton pastry are different sizes. I prefer to buy wonton pastry from an Asian supermarket, as they are bigger than some of the pastry for sale at the supermarket. If buying pastry from the supermarket you may need to reduce the amount of mince mixture in each gyoza by 1 teaspoon. 


INGREDIENTS

Gyoza
  • 500g lean pork, beef or chicken mince
  • 2 spring onions, finely chopped
  • 1 large garlic clove, finely chopped
  • 2-3 cm fresh ginger, grated
  • 2 small carrots or 1 large, grated
  • 1 cup wombok (chinese cabbage), finely shredded
  • 2 tablespoons soy sauce 
  • 1 egg, preferably free range, yolk & white separated
  • 1 x 330g packet of wonton pastry 
  • pastry brush
  • 1 tablespoon extra virgin olive oil 

COOKING

1. Place the mince, onion, garlic, ginger, carrot, wombok, soy sauce  and the yolk of the egg in a large bowl. Stir well to combine. 

2. Place the wonton wrappers on a clean surface. (If you are working with wrappers that have been in the freezer and are thawing, cover the wrappers with a damp tea-towel so they do not dry out). Place 2 teaspoons of the mince mixture in the centre of each wrapper. Brush the edges with egg white and fold over to close. You can pleat the edges of the wrapper with your fingers to seal or you can do as I like to do and fold the edges over each other, overlapping the edges and making a kind of rectangle. Repeat this process until all wrappers have been used or until the filling has run out. (If you end up with extra filling, roll the mince into balls and make meatballs!). 

3. Bring a large frying pan or saucepan with around 5cm of water to the boil. Once boiled, add as many gyoza as will fit without overcrowding. Reduce the heat to a simmer and cover, cooking for 3 minutes. Remove the gyoza from the pan and continue this process until all gyoza is cooked. Remove the water from the pan and dry. 

4. Heat the olive oil in the same pan and swirl to coat. Cook the gyoza on just one side, for 2 minutes or until lightly browned. Place the fried gyoza on paper towel to absorb the oil and continue this process until all gyoza are lightly fried. 

Serve alone or alongside a dipping sauce; I often eat these as is as they are so delicious! 

Serves / 4 as a main / 8 as an entree 
Total Preparation time / 30 - 40 minutes 
Total Cooking time / around 20 minutes


x Emily 

Monday, October 5, 2015

OMELETTE with CHICKEN & GREENS


A large portion of the recipes I make up come from experiences I have eating out. I had a delicious Asian Chicken Omelette at a Brisbane cafe recently which is where the inspiration for this versatile lunch or dinner omelette comes from. You can make each omelette individually, so that each serving has their own omelette (which is very cute) or you can make one big omelette in a large frying pan and then divide it into four even portions. You could make this omelette vegetarian by omitting the chicken and adding more vegetables, such as carrot, wombok (Chinese cabbage) and / or Chinese greens, such as buk choy and pak choy. 

Ingredients

  • 500g chicken breast, preferably free-range, fat trimmed and cut into small even pieces 
  • 1 large garlic clove, finely chopped
  • 3cm fresh ginger, finely chopped
  • 2 tablespoons oyster sauce
  • 8 eggs, preferably free-range
  • 4 teaspoons soy sauce 
  • 2 spring onions, finely chopped
  • 1 cup water 
  • 3 teaspoons extra virgin olive oil 
  • 150g green beans, trimmed and cut into small even pieces
  • 1 head of broccoli, stalk and florets cut into small pieces
  • Optional- a handful of fresh coriander leaves, to serve 
  • Optional- 1 extra spring onion, finely chopped 

Cooking

1. Combine the chicken, garlic, ginger and oyster sauce in a medium bowl. Place in the fridge to marinate for at least 10 minutes. 

2. Meanwhile, make the omelettes. Whisk 2 eggs, 1/4 cup water, 1 teaspoon soy sauce and 1/4 of the spring onions in a tall glass.  Heat a medium frypan over medium-low heat and add 1/2 teaspoon oil. Swirl to coat the pan then pour in the egg mixture. Cook for around 2 minutes on the first side or until the egg is almost set on one side. You can either flip the omelette in half so that it overlaps or you can flip the entire omelette over, however the latter method is quite tricky! Cook the omelette on the second side for only 1 minute or until set. Remove from heat and place each individual omelette on a serving plate. Continue this process until all four omelettes are cooked. 

3. Once the omelettes are cooked, heat the remaining teaspoon of olive oil in the fry pan over medium-low heat and swirl to coat. Add the marinated chicken and cook for around five minutes, stirring often, or until the chicken is cooked (the test: the middle of the largest piece of chicken is white, not pink). Remove the cooked chicken from the stove and divide evenly between the four plates, keeping the chicken liquids in the pan. Place on top of each omelette or to the side. 

4. Add the beans and broccoli to the pan and cook, covered, over medium-low heat for around 4-5 minutes or until the broccoli is just starting to become tender (the test: you can slide a fork into the stalk of the biggest broccoli floret and encounter just a little resistance). Remove from the heat and divide the cooked vegetables evenly between the four plates. Place the vegetables on  top of each omelette or to the side. 

Serve warm, topped with extra spring onions and/or coriander, if desired. 

Serves /
Total Preparation time / max 15 minutes 
Total Cooking time / 25 minutes 

x Emily 
Related Posts Plugin for WordPress, Blogger...