|   HOME   |   PILATES   |   FOOD   |   FITNESS   |   HEALTH   |   MY STORY   |
Showing posts with label HEALTHY. Show all posts

Wednesday, October 28, 2015

SALMON and VEGETABLE MUFFINS


I've finally found a way for myself to enjoy salmon! I really hate that I cannot stand salmon fillets, as I know how healthy they are for me. After eating red salmon in a sandwich that a lovely friend's mum made for me a while back, I realised that I didn't mind salmon in a tin! I figure that if I start eating salmon in these muffins I will be able to gradually work my way towards salmon fillets! I eat these with a side salad for a light dinner. You can top the muffins with extra herbs and a dollop of reduced-fat sour cream, if desired. 

INGREDIENTS

  • extra virgin olive oil spray or 2 teaspoons extra virgin olive oil
  • 4 eggs, preferably free-range
  • 1 can (210g) red salmon, drained, flaked & any bones removed
  • 1/4 cup reduced fat cows milk (or if intolerant/allergic to dairy substitute for lactose-free, soy or unsweetened almond milk)
  • 1/4 cup water 
  • 1/2 red or green capsicum, deseed and finely chopped
  • a generous handful of baby spinach, chopped
  • a small handful of dill and / or parsley, finely chopped
  • 30g reduced fat feta, crumbled
  • a generous amount of ground black pepper


COOKING 

1. Preheat a fan forced oven to 180 degrees. Spray or brush all holes of a 12 standard muffin tray. 

2. Whisk the eggs in a medium bowl, then add the salmon, milk, water, capsicum, spinach, herb/s, feta and pepper. Mix well to combine and add more water if the mixture is too thick for your liking. 

3. Pour the salmon & egg mixture into the prepared muffin holes. I like to make big muffins, therefore I usually make around 9 muffins. If you want to make 12 muffins, pour a little less into each muffin hole. 

4. Bake for around 25 minutes or until egg is just set and golden. Remove warm, topped with extra herbs, if desired. 

Makes /
Total Preparation time / under 15 minutes 
Total Cooking time / 25 minutes 

x Emily 

Tuesday, October 27, 2015

BROWN RICE, CHICKEN & CHINESE BROCCOLI


This is a very simple dish, inspired by my husband saying that he wanted 'chicken, brown rice and broccoli' for dinner. I had bought some Gai Lan (Chinese broccoli) from a farmers market on the weekend which I absolutely love with oyster sauce and soy sauce. Gai lan has thick green stems and dark green leaves, both of which can be eaten. You can certainly fry the chicken breast with 1 teaspoon extra virgin olive oil or sesame oil and 1 finely chopped garlic clove, however I prefer poaching chicken as it uses no oil and does not dry out, hence this is the method I used in the recipe below. 

INGREDIENTS
  • 2 chicken breasts, even in size (around 450-500g in total)
  • 1 large garlic clove, peeled & sliced 
  • 1 tablespoon soy sauce
  • 1 cup brown rice
  • 1 head of broccoli, florets and stalk chopped into even pieces
  • 1 bunch of Gai lan (Chinese broccoli), ends of stalks removed (these are too tough to eat) and stalks and leaves separated 
  • Optional - 1/4 cup green shallots, finely chopped, to serve 
Sauce
  • 2 tablespoons oyster sauce
  • 1 tablespoon soy sauce
  • 1 tablespoon lime juice
  • 1 tablespoon sushi vinegar or mirin
  • 1 teaspoon sesame oil

COOKING 

1. Fill a medium saucepan halfway with water, add the chicken breasts, garlic and soy sauce. Bring to the boil, covered, then simmer for 10 minutes. After this time turn off the stove and leave the chicken to sit for 5 minutes, before removing the chicken and placing it on a chopping board to cool for 5 minutes before shredding it. 

2. Meanwhile, add the brown rice to another medium or small saucepan with 2 cups of water and bring to the boil, covered. Reduce to a simmer, still covered, and cook for 15-18 minutes or until the rice is tender and the water has been absorbed. 

3. Prepare the sauce by combining all the ingredients in a small bowl or cup/mug. Add a few tablespoons of water to thin out the sauce and stir vigorously to remove any lumps. 

4. In a third saucepan (or if not available wait until the chicken or rice is finished to use that saucepan), fill with around 10cm of water and bring to the boil, covered. Once boiled add the gai lan stalks and the broccoli, as these take longer to cook than the leaves. When the stems have become bright green, or have been cooking for 2 minutes, add the leaves to the water and cook for 1-2 minutes or until the leaves are wilted. Remove from heat and drain the vegetables until cold water in a colander. Roughly chop the gai lan leaves. 

Combine the chicken, rice, sauce and vegetables in a large serving bowl, stirring well. Divide into 4 serving bowls and top with finely chopped green shallots, if desired. 

Serves / 4
Total Preparation time / 10 minutes 
Total Cooking time / around 30 minutes 

x Emily 


Saturday, October 24, 2015

TURKEY & POTATO SALAD


Summer has almost come to Brisbane! Time to crowd the beaches, work on our tans and host Sunday afternoon bbq’s.  Time, as well, for many of us to change our palates. I don’t know about you, but if the temperature outside is above 30 degrees, I cannot stomach hot food very well. All my meals have to be refrigerated and take on the form of ‘salads’. Simple to prepare, this turkey & potato salad would make an excellent dish for a lazy bbq on a Sunday afternoon.

INGREDIENTS 

  • 550g (1 large) sweet potato, peeled and cut into 3cm pieces
  • 2 teaspoons extra virgin olive oil
  • 1 large garlic clove, finely chopped
  • 400g turkey breast/fillet, cut into even 3-4cm pieces
  • 1/2 teaspoon ground paprika
  • the juice of 1 lemon 
  • 150g pickles, roughly chopped 
  • 1-2 handful/s of fresh spring onions, chives, parsley and/or coriander, finely chopped 
  • 40g reduced-fat feta, crumbled

COOKING 

1. Place the potatoes in a medium saucepan half filled with water and bring to the boil. Boil for around 10 minutes or until potatoes are tender but not mushy. Drain well in a colander over cold running water. 

2. Whilst the potatoes are cooling, heat 1 teaspoon oil in a medium to large frying pan over medium heat and add the garlic. Stir for 1-2 minutes or until garlic is fragrant, then add the turkey. Cook, stirring often for around 6 minutes or until all pieces are coloured and no pink flesh remains. Turn off the heat and leave the turkey in the pan, covered, to rest for 5 minutes. 

3. Stir the remaining teaspoon of oil, lemon juice, ground paprika and a splash of water in a small bowl or cup. 

4. Place the potato in a large serving bowl and add the turkey, pickles, fresh herb/s, feta and a generous pinch of ground black pepper. Drizzle the dressing from step 3 over the top and divide into four bowls. 

Serves /
Total Preparation time / 15 minutes 
Total Cooking time / 25 minutes 


x Emily 

Tuesday, October 20, 2015

PUMPKIN MASH


Pumpkin is my vegetable of choice for autumn and winter.  Not only do I adore the bright colour, I love the taste and the versatility of this humble vegetable. Just add a few simple ingredients to pumpkin and you’ve got yourself a filling and satisfying dish. I recently looked into the nutritional composition of this orange beauty and realised just how good this vegetable is for you...

·      Pumpkin has a super high carotenoid content, which assists in deterring premature aging, cardiovascular problems and other infections. Carotenoids are also high in Lutein and Zeaxanthin, minerals which protect the eyes and inhibit the formation of cataracts and deterioration of the eye tissue. 
·      Pepitas, or the seeds in the pumpkin, are a fantastic source of protein. Just one ounce or 29 grams of pepitas contains a massive 7 grams of protein.
·      Pumpkin flesh and seeds are rich sources of Vitamin A, which does wonders for boosting your immune system and improving the condition of your eyes.
·      Pumpkin contains a considerable amount of Vitamin C, which is proven to attack several forms of cancer as well as increasing the body’s immunity and fighting free radicals.
·      Pumpkin seeds are filled to the brim with essential fatty acids, which offer protection against common health diseases including arthritis, cancer and high blood pressure. Fatty acids also increase brain power and encourage healthy skin.
·      Fibre can sometimes be a tough ingredient to incorporate into your daily diet. Luckily, pumpkin has plentiful amounts of good dietary fibre, which assists in lowering bad cholesterol levels in the blood as well as helping to regulate blood sugar levels. Pumpkin flesh is a very effective remedy for gastro illnesses such as indigestion and constipation.
·      Pumpkin is also choc-full of Zinc & Potassium. Zinc is essential for improving bone density as well as boosting the immune system and keeping the reproductive system healthy. A diet filled with Potassium can reduce the onset of hypertension and cardiovascular diseases.
·      Pumpkin flesh and pumpkin seeds are loaded with the mineral magnesium, which is involved in the maintenance of muscles, bones and teeth as well as many other biological functions. 


INGREDIENTS
  • 750g pumpkin, (approximately 1/2 a butternut pumpkin) deseeded, peeled & chopped into even sized small pieces
  • 1 tablespoon extra virgin olive oil
  • 1 large garlic clove, finely chopped or crushed 
  • 1/2 cup reduced fat cows milk (or if dairy intolerant / allergic try soy, lactose-free or unsweetened almond milk) 
  • 1 tablespoon ground sage and/or 1 tablespoon fresh sage, finely chopped

COOKING 


1. Place the pumpkin pieces on a large heatproof plate and cover with glad wrap. Microwave on high for 5 minutes or until pumpkin is soft. Alternatively, if you do not have a microwave, steam the pumpkin in a saucepan with water just covering the pumpkin for around 5 minutes. 

2. Heat the oil in a medium saucepan over medium-high heat and swirl to coat the pan. Add the garlic to the pan and cook for 1 minute. Add the softened pumpkin to the pan and cook, stirring frequently, for 2 minutes or until very soft. Add the sage and the almond milk, one 1/4 cup at a time, mashing and stirring until the milk has been absorbed and the pumpkin is smooth. Remove from heat and season with ground black pepper. Serve warm. 

Serves / 4 as a side  
Total Preparation time / 5 minutes  
Total Cooking time / around 10 minutes 


x Emily 

Sunday, October 18, 2015

BEETROOT DIP with SPICES


There is nothing tastier than homemade dip. Supermarket processed guacamole, hummus and tzatziki pale in comparison. I have wanted to make my own beetroot dip for a long time as being Russian beetroot is one of my major food groups. Adding the ground cumin and coriander added a beautiful depth to the dip. You can use any spices you like for making beetroot dip, but lemon juice and yoghurt are a must. 


INGREDIENTS

  • 1 large fresh beetroot, peeled & cut in half 
  • 1 large garlic clove, finely chopped
  • 1 teaspoon ground cumin
  • 1 teaspoon ground coriander
  • 1/2 cup 99% fat free natural yoghurt
  • 2 tablespoons fresh lemon juice 

COOKING 


1. Preheat fan-forced oven to 200 degrees celsius and wrap the beetroot halves in foil. Cook for 25-30 minutes or until beetroot is tender (that is, you can slice the beetroot with a knife easily). Remove from oven and leave to cool for 5-10 minutes, then slice beetroot into small pieces.

2. Meanwhile, dry fry the garlic in a small frying pan (That is, do not add any oil to the pan) for 2 minutes or until garlic is fragrant. Remove from heat. 

3. Place beetroot pieces, garlic, cumin, coriander, lemon juice and yoghurt in a blender or food processor. Blend/process ingredients until smooth and no lumps of beetroot remain (this should only take 30 seconds or so). 

Serve dip with crackers. 

Serve as a snack
Total Preparation time / 10 minutes 
Total Cooking time / 45 minutes 


x E

VEGETARIAN (or not) OMELETTE


Eggs are a great way to get your protein and good fat hit. I don't think of omelettes or eggs for that matter as exclusively for breakfast; they are a wonderful late night dinner idea, as they are low in carbs and full of flavour. I have always been a little apprehensive about cooking omelettes, however after several attempts over the years I am confident with my recipe below. The finished product may not look as fancy as what would appear on your plate at a cafe, but it is tasty, nutritious and simple to make. I prefer this omelette sans meat, however I do realise that will not like this, hence the optional addition of bacon or ham. Ground or smoked paprika is also optional- if this is not in your pantry just use more ground black pepper. 


INGREDIENTS
  • 1 1/2 teaspoons extra virgin olive oil 
  • 1/4 small red onion (30g), finely chopped 
  • 1/2 a small red capsicum, roughly chopped
  • 1/2 a small green capsicum, roughly chopped
  • Optional - 1/2 teaspoon ground or smoked paprika 
  • Optional- 80g bacon or 100g ham, trimmed of fat, roughly chopped
  • 4 eggs, lightly beaten
  • 1/2 cup water 
  • 2 tablespoons fresh chives, roughly chopped, plus extra, to serve 
  • ground black pepper 
  • 20g reduced-fat feta, crumbled 
  • a small handful of baby spinach 

COOKING 

1. Heat 1/2 teaspoon of oil in a medium frying pan over medium heat and cook the onion for 2 minutes or until the onion has softened. Add the capsicum and the paprika and/or meat if using and stir for 2 minutes or until well combined and the capsicum is just al dente (still slightly crunchy). If you are cooking bacon or ham this step may take slightly longer, depending on how you like your meat cooked. Remove from the pan when cooked and keep warm. 

2. Whisk the eggs, water, chives and a generous pinch of pepper in a deep bowl or jug. Heat 1/2 teaspoon of oil in a medium frying pan on low to medium heat and swirl to coat. Pour in half of the omelette mixture and leave until the egg is set around the edges; this should take around 2-3 minutes. Carefully fold one half of the omelette over the other and leave to cook for another minute or until the the omelette has just set.  Remove the omelette from the pan, place on a serving plate and add half of the capsicum mixture, topping with feta and half of the baby spinach. Repeat the cooking process with the remainder of the egg mixture. 

Serves /
Total Preparation time / max 10 minutes 
Total Cooking time / around 15 minutes 


x Emily 


Tuesday, September 29, 2015

PRAWN & VEGETABLE RICE NOODLES


I love eating prawn vermicelli salads when I go out to Vietnamese restaurants. Making your own is actually very easy and cheaper! I like to buy ready made prawns, that is, prawns that have already been peeled and deveined themselves, if I am time poor. Otherwise super fresh prawns will do, they will just require a little more prep time to remove their shells, tails and faeces track. I love the thicker rice noodles, but you could substitute for vermicelli. As there are only 50g cooked noodles per serving, the carbs are relatively low and the meal is light. Add whatever vegetables you have on hand that can be eaten raw. 

INGREDIENTS

Noodles 
  • 250g uncooked prawns, peeled, deveined & washed
  • 2-3cm fresh ginger, finely chopped
  • 1 garlic clove, finely chopped
  • 1/2 - 1 teaspoon chilli flakes
  • 2 spring onions, plus extra to serve, finely chopped
  • 1 teaspoon sesame oil 
  • 100g pad thai rice noodles (thicker than vermicelli)
  • 150g green beans, trimmed and cut into small pieces 
  • 1 large carrot, grated 
  • 1 lebanese cucumber or 1/2 a continental cucumber, diced
  • Optional - a handful of fresh coriander leaves, washed & roughly chopped 

Dressing 


  • 2 teaspoons fish sauce 
  • the juice of 1 large lime
  • 2 tablespoons soy sauce
  • 1 tablespoon apple cider vinegar
  • 1 teaspoon honey
  • 2 tablespoons water 

  • COOKING 

    1. Marinate the prawns with the ginger, garlic, chilli, spring onions and oil in a medium bowl. Place in the fridge until step 4. 

    2. Meanwhile, bring a medium saucepan filled halfway with water to the boil, covered. Once boiled add the noodles and cook for 3-4 minutes or until the noodles are tender but not mushy. Remove from the heat and drain the noodles in a colander under cold running water, separating the noodles with a fork. 

    3. Make the dressing by combining all ingredients in a small bowl and stirring to combine. 

    4. Heat a small to medium fry pan over medium-low heat. Once warm add the prawns and cook, stirring, for 2-3 minutes or until the garlic and ginger is cooked and the prawns are pink in colour. Remove from heat. 

    5. Place the cooked prawns in a large serving bowl with the cooked noodles. Add the beans, carrot, cucumber, a handful of spring onions and coriander, if using and toss well to combine. Drizzle the dressing over the top and toss again. 

    Serves / two 
    Total Preparation time / max 15 minutes (longer if you need to prepare the prawns yourself) 
    Total Cooking time / 15 minutes 


    x Emily 

    Sunday, September 27, 2015

    GRILLED TUNA BROWN RICE SALAD


    Creating more recipes that use fish has been a fun challenge for me. I have found myself loving tuna steaks and wanting to cook with them a couple times a week. This salad includes a small amount of brown rice, however you can omit the rice for a super light meal. Just make sure that without the rice you do not get hungry after dinner and snack on something else! 

    Ingredients

    Salad
    • 1/2 cup brown rice
    • 2 large handfuls of lettuce or baby spinach or mixed 
    • 1 large tomato, thinly sliced
    • 100g green beans, trimmed and chopped into small pieces
    • 120g continental or Lebanese cucumber, diced
    • 1 spring onion, finely chopped
    • 30g reduced-fat feta, crumbled 
    • 250g tuna steak, cut in half 
    • 1 teaspoon extra virgin olive oil 
    • aluminium foil 
    Dressing
    • 2 tablespoons soy sauce
    • 1/2 teaspoon chilli flakes
    • 1 spring onion or 2 tablespoons fresh chives, finely chopped
    • 1 teaspoon fish sauce
    • 2 tablespoons water 

    Cooking 

    1. Bring the rice and 1 and a 1/4 cups of water to the boil, covered, then simmer for 8 minutes or until all water is absorbed and the rice is tender. Remove from heat. 

    2. Meanwhile, prepare the salad by chopping and tossing the lettuce, tomato, beans, cucumber, spring onion and feta in a large serving bowl. 

    3. Make the dressing by pouring all ingredients into a small bowl and stirring. 

    4. Stir the tuna steak with the olive oil. Bring either a grill plate or a frying pan to high heat. Add the tuna and leave to cook for 2 minutes each side. After this rest the cooked tuna for 2 minutes wrapped loosely in the al foil. Once the 2 minutes are up, carefully slice the tuna. 

    Add the brown rice and tuna to the salad and lightly toss. Drizzle the dressing on top and divide into 2 bowls. 

    Serves / two 
    Total Preparation & Cooking time / max 20 minutes 

    x Emily 

    ORANGE & POPPYSEED PANCAKES


    I love using citrus zest in place of sugar to add flavour to otherwise bland ingredients. Take these Orange & Poppyseed pancakes. Without the orange rind and poppy seeds, this recipe is are dangerously close to producing standard, run of the mill pancakes. Add some orange zest & juice with a sprinkling of poppy seeds and enter the flavour. 


    INGREDIENTS
    • 1 cup self-raising flour (or gluten-free self-raising flour if intolerant)
    • 2 tablespoons poppy seeds
    • 1 tablespoon natural maple syrup (not 'flavoured' maple syrup)
    • 1 cup reduced-fat cows milk (or lactose-free, soy or unsweetened almond or oat milk if intolerant to dairy)
    • a dash of vanilla essence 
    • 1 free range egg, lightly beaten
    • the zest and juice of a medium orange 
    • extra virgin olive oil spray or 2 teaspoons extra virgin olive oil 

    COOKING 

    1. Combine the flour and poppy seeds into a large bowl. Make a well or hole in the centre. Pour the syrup, milk, vanilla, egg and orange zest & juice in a medium bowl into the well and stir well to combine. 

    2. Heat a pancake pan or medium non-stick frying pan on medium-low heat and add cooking oil spray or 1 teaspoon olive oil. Using a 1/4 cup as a measurement, spoon the mixture into the pan in droplets and create circles. (However big you want to make the pancakes is up to you- I find that it is easier to cook them if they are slightly bigger than pikelets but smaller than pancake size). Turn each pancake over when bubbles begin to appear on the surface. Keep the pan on medium-low heat. Cover to keep warm and repeat until all batter has been used. 

    These pancakes have enough flavour so there is no need to serve with any syrup! You can reserve some of the orange zest and poppy seeds and serve with these sprinkled on top, if desired. 

    Serves /
    Total Preparation & Cooking time / around 15 minutes 


    x Emily 

    Monday, September 21, 2015

    BAKED BARRAMUNDI with MUSTARD & LEMON


    In my effort to cook more fish, I created this baked barramundi dish. Super simple to make, it requires next to no time in the kitchen as the 1 hour prep and cooking time is made up of 25 minutes of marinating, 25 minutes of baking in the oven. Therefore it is a great recipe for those who are time poor or who do not like the kitchen. In addition it is a very healthy, super light dish, perfect for dinner. 

    INGREDIENTS

    • 2 tablespoons dijon mustard
    • the juice of 1 medium lemon
    • 1 teaspoon extra virgin olive oil
    • 2 spring onions, finely chopped
    • a generous sprinkling of ground black pepper
    • 500g barramundi fillets, skin & bones removed
    • a baking dish, around 25cm x 15cm or bigger
    Side Salad
    • 1 large tomato, roughly chopped
    • 1 medium carrot, grated
    • 2 generous handfuls of lettuce
    • 100g green beans, trimmed and roughly chopped
    • 1 ripe avocado, diced 


      COOKING 

      1. Combine the mustard, lemon, oil, spring onion, pepper and a tablespoon of water and stir well to combine. Brush or pour onto the barramundi fillets then marinate in the fridge for 25 minutes. 

      2. Preheat a fan forced oven to 180 degrees celsius. 

      3. Whilst the barramundi is marinating, make the salad by combining all ingredients and tossing well. 

      4. When 25 minutes is up, place the marinated barramundi in a single layer in the baking dish. Bake in the oven for 25 minutes. Remove from the oven after this time and check that the fish is cooked by lightly shredding the biggest piece with a fork; if the flesh is white in the middle of the piece, the fish is cooked. 

      Divide the salad and barramundi into 4 servings and serve the fish on top of the salad. Season with extra pepper if desired. 

      Serves / 4
      Total Preparation & Cooking time / 1 hour, including the 25 minutes marinating time and the 25 minutes cooking time. 

      x Emily 

      Sunday, September 6, 2015

      CHICKEN SATAY SKEWERS with ZESTY BEAN SALAD


      Do not be discouraged from making these skewers due to the several hours of marinating as this time is needed to give the satay sticks an intense flavour. It is hard to determine if the essence of lime or peanut butter is more dominant, as each bite of chicken delights your taste buds with a slightly different flavour from the previous morsel. The zesty salad tastes incredibly healthy and fresh and is a great accompaniment to the chicken satay or other main meals that need a side salad. One important note re the salad dressing: do not scrap on the lemon juice and use from a bottle as it tastes much more zesty freshly squeezed! The salad dressing is a knockoff from my dad: he loves to make his own dressing. 

      INGREDIENTS

      Chicken Satay Skewers
      • 500g chicken breast, cut into 3cm cubes
      • 2 tablespoons smooth reduced-fat peanut butter
      • 1/4 cup lime juice
      • 3 tablespoons soy sauce 
      • 1 garlic clove, crushed or finely chopped
      • baking paper 

      Zesty Bean Salad
      • 2 handfuls of mixed lettuce, washed & drained
      • 1 x 400g tin cannellini or butter beans, washed & drained
      • 1/2 a small red onion, finely chopped
      • 2 medium tomatoes (around 230g), cut into wedges
      • 40g reduced-fat feta, crumbled 
      • Optional- 2 tablespoons fresh basil or parsley, roughly chopped 
      • 1 large garlic clove, finely chopped or crushed
      • 1 tablespoon dijon mustard
      • 1 teaspoon olive oil
      • 2 tablespoons freshly squeezed lemon juice 

      COOKING 

      1. Combine the chicken, peanut butter, lime juice, soy sauce and garlic in a medium bowl. Stir ingredients together well (the peanut butter needs some extra stirring to combine with the other ingredients). Leave to marinate in the fridge for eight hours. 

      2. Soak 8 wooden skewers in water for at least 30 minutes prior to cooking. (This is so the skewers do not split in the oven). 

      3. Preheat the oven to 180 degrees celsius and line a medium to large baking tray with baking paper. After the chicken has marinated, thread the chicken onto the soaked skewers on the prepared tray, taking care to thread even amounts of chicken onto each of the eight skewers. Cook in the oven for 10 minutes, flipping the sticks over at the five minute mark. After this time check that the chicken is cooked by removing it from the oven, leaving for a few minutes, then cutting into the biggest cube of chicken and checking that the flesh is white and no longer pink). 

      4. Whilst the skewers are cooking, combine the lettuce, beans, red onion, tomatoes, feta and basil/parsley (if using) in a serving bowl and toss well. 

      5. Whisk together the garlic, mustard, oil, lemon juice and a pinch of pepper until combined. Add a splash of water if you would like to make the dressing a little thinner in consistency (I like to!). Drizzle on top of the salad and toss. 

      Serve 2 skewers per plate with a serving of salad 

      Serves 4 / 2 skewers each & a quarter of salad 
      Preparation time / 10 minutes, plus 8 hours marinating time

      Cooking time / 10 minutes

      x Emily 


      Tuesday, September 1, 2015

      SEARED TUNA with ASIAN GREENS


      In my effort to eat more fish, tuna has become the star meat! I love how the taste of tuna steak is not the least bit fishy, especially when combined with Asian flavours. Here is my latest tuna creation; Seared Tuna Steak with Asian Greens. I really like adding edamame to stir frys, however if you are not a fan of soy beans or do not have access to them, you can use 1/2 a head of broccoli instead. I stress that everyone has different stove heatings and likes their tuna cooked differently, so cook it to your liking. In this recipe this tuna is cooked medium rare, not rare. 

      INGREDIENTS

      • 1/2 cup brown rice 
      • 2 tablespoons kecap manis
      • 2 tablespoons rice wine vinegar
      • 1 tablespoon lime juice
      • 1 garlic clove, finely chopped
      • 2cm fresh ginger, grated
      • Optional- 5cm lemongrass, finely chopped
      • 1 teaspoon extra virgin olive oil 
      • 2 x 150-200g tuna steak
      • 1/2 a bunch pak choy, end removed and roughly chopped
      • 1/2 a bunch buk choy, end removed and roughly chopped
      • Either 1/2 a head of broccoli, finely chopped into even sized florets OR 100g edamame beans, shelled (weighed after shelling)
      • 2 teaspoons sesame seeds
      • 2 spring onions, finely chopped, to serve 

      COOKING 

      1. Bring the brown rice and 1 cup of water to the boil in a small to medium saucepan over high heat, covered. Once boiled, reduce to a simmer and cook for around 10 minutes or until all water is absorbed and the rice is just tender. 

      2. Meanwhile, pour the kecap manis, vinegar, lime juice, garlic, ginger, lemongrass if using and 2 tablespoons of water into a mug or small jug and stir to combine. Set aside near the stove. 

      3. Heat the olive oil in a medium frying pan over medium heat, swirling to coat. Add the tuna steaks and cook for 2 minutes each side. After this time return the tuna to the original side and pour the sauce mixture from step 2 over the top of the tuna. Cook the tuna for 30 seconds each side, making sure to cover it with the sauce. Remove the tuna from the pan, leaving the sauce in the pan and placing the cooked tuna onto your serving plates. 

      4. Add the pak choy, buk choy and broccoli or edamame to the pan and cook, stirring often so that the sauce does not stick to the pan, for 3-5 minutes or until the vegetables are tender. Remove from heat. 

      Serve each tuna steak with half of the vegetable sauce mixture and half of the rice. Sprinkle 1 teaspoon of sesame seeds and half of the chopped spring onions on top of each dish. 

      Serves /
      Total Preparation time / max 15 minutes 
      Total Cooking time / max 15 minutes 


      x Emily 
      Sunday, August 23, 2015

      HOW TO POACH AN EGG


      In this breakfast dish I describe the fine art behind poaching eggs (or at least what I have picking up from my partner, cooking magazines and my mother). Do not be afraid to try this recipe because of the detailed 3rd step, as this detail is designed to help, not hinder your cooking. Best of luck! I think if you can poach an egg and serve it in a somewhat 'pretty' condition, you can do pretty much anything in the kitchen (besides perhaps de-boning a duck or killing a live lobster).


      INGREDIENTS

      • 2 free range eggs 
      • 2 tablespoons white vinegar 
      • 1/4 a small avocado, generously spread onto the toasted bread
      • 1 piece of multigrain, wholemeal or gluten-free bread, toasted 
      • 1 handful washed baby spinach
      • 1 small to medium tomato, sliced
      • Optional- a squeeze of lemon and a tablespoon or 2 of chopped fresh herbs, such as basil, chives, parsley, etc. 
      • 10g reduced-fat feta, crumbled 

      COOKING 

      1. Bring the eggs to room temperature as warm eggs will take less time to poach. Crack one egg into a small cup and add 1 tablespoon white vinegar. Repeat in a separate cup with the other egg. (I use vinegar as this helps to set the egg). 

      2. Fill a large saucepan/ frying pan with 8cm of water. Bring the water to the boil, then reduce to medium-low heat and simmer. (You will know the water is simmering when you can see small bubbles at the base of the pan). Use a wooden spoon or whisk to stir the water in one direction, creating a whirlpool. Pour in one egg at a time, making sure to pour the egg as close to the water surface as possible, in the middle of the whirlpool. (The whirlpool motion is essential as it makes the egg white wrap around the egg yolk to form a round shape). Cook for 2-3 minutes for a semi-soft yolk or 3-4 minutes for a firmer yolk. NB- Do not stir the water once the egg is cooking. 

      3. Use a slotted spoon to transfer the egg on top of your toast (which can be 'buttered' with avocado). Serve the poached eggs with baby spinach, tomato, lemon juice, fresh herbs and feta piled on top or on the side. 

      Serves / 1 
      Total Preparation time / 15 minutes 
      Total Cooking time / 12 minutes 


      x Emily 

      SWEET SUMMER SLAW VERMICELLI


      The name and adaptation of this recipe comes from one of Yotam Ottolenghi’s amazing vegetarian creations. Yotam likes to make this ‘slaw’ as he calls it, with caramelised macadamia nuts and lots of papaya, green cabbage, mint and coriander. Not being a fan of caramelising ingredients due to the high quantity of butter and sugar used, I decided to opt for a relatively small amount of peanuts and raw shallots. You could serve this salad naked, or with vermicelli noodles like myself to make it more filling. Definitely a summer salad for the hot steamy Brisbane weather! 


      INGREDIENTS


      Dressing
      • the juice of 2 small limes 
      • 1 large garlic clove, finely chopped
      • 1/4 teaspoon dried chilli flakes
      • 1 tablespoon soy sauce
      • 1 tablespoon maple syrup
      • 2 tablespoons sesame seeds
      • 2 tablespoons water 

      Salad

      • 150g rice vermicelli noodles
      • 1/2 a red cabbage, washed & finely shredded
      • 2 large carrots (around 300g), finely grated
      • 1 medium mango (around 100g), diced 
      • 2 spring onions, finely chopped
      • 2 tablespoons fresh basil / coriander, torn 
      • 1/4 cup roasted unsalted peanuts
      • Optional- 1 ripe avocado, diced 


      METHOD 

      1. To make the dressing, whisk all the ingredients in a small bowl. 

      2. Fill a large heatproof bowl with boiling hot water and place the raw vermicelli in it. Leave to sit for 5 minutes, then drain well with cold water. Place the cooked vermicelli in a large serving bowl and toss the red cabbage, carrot, mango, spring onion, basil, peanuts, dressing and avocado, if using, in the bowl. Serve cold. 


      Serves / 4
      Total Preparation time / 15 minutes 
      Total Cooking time / max 10 minutes 

      x Emily 

      Friday, August 14, 2015

      PRAWN, ZUCCHINI & TOMATO PASTA


      I am trying to incorporate more seafood into my diet as I know how good it is for me! My husband unfortunately does not really care for it so this will be interesting! First up: a very simple but delicious and hearty prawn pasta. The prawns should be fresh from a supermarket deli or a butcher. I like to purchase them already cooked with their shells removed as it is a real time saver. You often cannot buy them sans tails, however it only takes a few seconds to remove the tails and I quite enjoy this task! When I'm not in a big rush I cook the pasta first, drain it and then use the same saucepan for step 2, however you can have both step 1 and 2 going at the same time (just make sure the water has boiled in step 1 before you start step 2, so that the pasta will be cooked by the time you need it to be!). 


      INGREDIENTS
      • 400g gluten-free pasta (or regular pasta if not allergic/intolerant)
      • 1 tablespoon extra virgin olive oil 
      • 2 medium zucchini, chopped into 2cm cubes
      • 1/2 red onion, finely chopped
      • 1 large garlic clove, finely chopped
      • 2 tablespoons tomato paste 
      • 1 small red chilli, finely chopped or 1/2-1 teaspoon chilli flakes
      • 300g cooked prawns, shells removed, with or without tails
      • 250g cherry tomatoes, washed & halved
      • 2 tablespoons fresh basil and / or fresh parsley 
      • 40g reduced-fat feta, crumbled or 40g shaved paramesan (or if dairy free, 40g goats or sheep's feta)

      COOKING 

      1. Bring a large, lightly salted saucepan of water to the boil over high heat. Add the pasta and cook, stirring occasionally, for 6-8 minutes or until the pasta is cooked to your liking. Remove from heat and drain in a colander, reserving 1/2 a cup of the pasta water. 

      2. Meanwhile, heat the oil in a large, deep fry pan over medium heat and swirl to coat. Add the zucchini pieces and cook, stirring frequently, for 2 minutes. Add the onion and garlic and stir all together for another 2 minutes. Pour in the tomato paste and chilli and stir well to combine. Gradually pour in the 1/2 cup pasta water you reserved, just a couple tablespoons at a time and continue stirring until the water is absorbed. Reduce the heat to a simmer and add the cooked pasta, prawns, cherry tomatoes, herb/s and cheese. Stir until the pasta is warmed through and all ingredients are combined. Remove from heat. 

      Divide pasta evenly into 4 bowls and serve with extra herb/s on top, as well as a generous pinch of ground black pepper, if desired. 

      Serves / 
      Total Preparation time / around 15 minutes 
      Total Cooking time / 15-20 minutes 


      x Emily 

      Thursday, August 6, 2015

      RED LENTIL SOUP


      I do not subscribe to the no lentils and legumes rule that the Paleo eating plan enforces, as I love their nutty & earthy taste and the benefits far out weight whatever carbs they contain. Low in calories, basically fat-free and high in nutrients, lentils & legumes should be on everybody's plate at least once a week. Lentils themselves lower cholesterol, are a great source of protein, iron and magnesium, assist in weight loss, stabilise blood sugar due to their high fibre levels, increase energy and play a role in both heart and digestive health. I chose red lentils for this soup as they are quicker to cook than any other types of lentils, making them a perfect match for a busy cook. Do not be alarmed when your red lentils change colour whilst cooking! They will start off as a beautiful salmon colour when raw and will fade to a golden yellow colour as they cook. 

      INGREDIENTS

      • 1 cup red lentils
      • 3 cups salt-reduced vegetable stock
      • 6 cups water
      • 3cm fresh ginger, finely chopped
      • 3 garlic cloves, finely chopped
      • 1 medium brown onion or medium leek (white part only), finely chopped
      • 2 medium carrots, peeled and chopped into even pieces
      • 200g pumpkin, peeled & seeds removed, chopped into even pieces
      • 1 head of broccoli, cut into even sized florets and stalk finely chopped 
      • Optional- 2 celery stalks, chopped into even pieces
      • Optional- 2 medium tomatoes, chopped into even pieces
      • 2 tablespoons tomato paste
      • 2 bay leaves
      • 1/2 cup fresh parsley, finely chopped, plus extra to garnish
      • Optional- 4 sprigs of thyme
      • ground black pepper 

      COOKING 

      1. Combine the lentils, stock and water and bring to the boil in a large saucepan, covered. 

      2. Once boiled, reduce the heat to a low simmer and add the ginger, garlic, onion/leek, carrot, pumpkin, broccoli, celery & tomato if using, tomato paste, bay leaves, fresh parsley and thyme if using. Simmer, covered, for around 20 minutes or until the liquid has thickened slightly and all the vegetables are tender. 

      3. Remove from the stove, find and discard the bay leaves and the thyme sprigs. Stir in a generous pinch of ground black pepper. Serve warm, with extra parsley on top, if desired. 

      Serves /
      Total Preparation time / up to 25 minutes 
      Total Cooking time / 30 minutes 
      x Emily 

      Monday, August 3, 2015

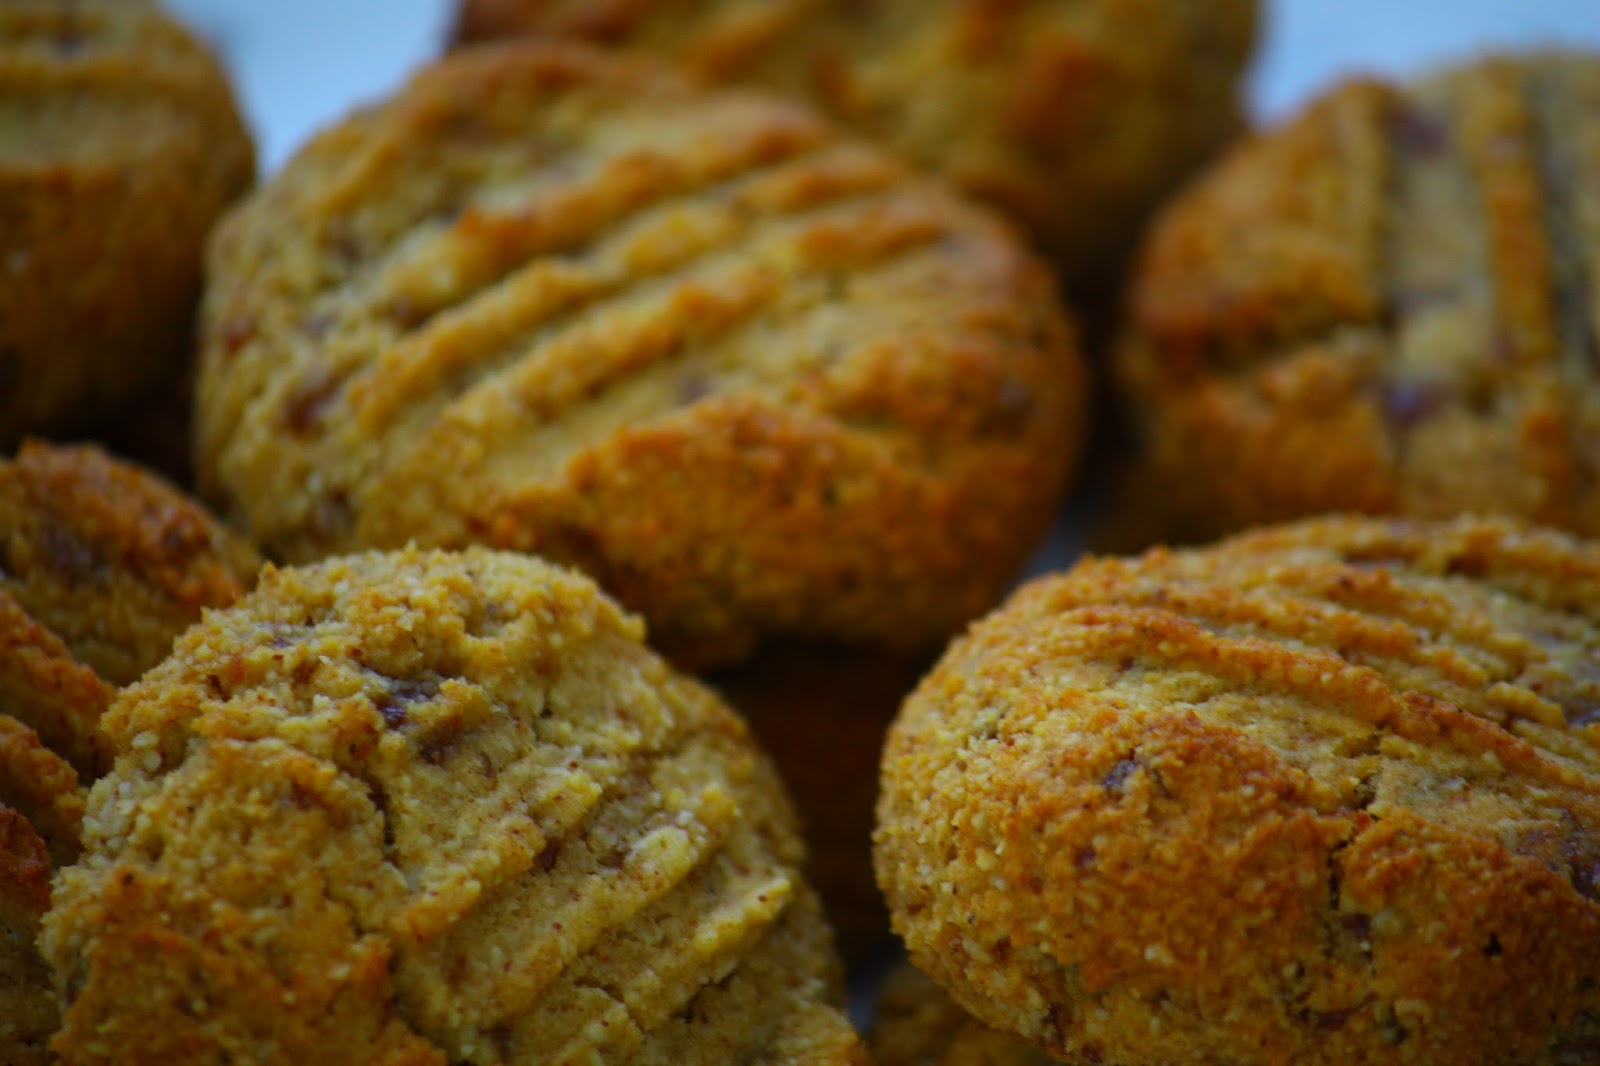
      FREE from REFINED SUGAR COOKIES


      If you ever seen a professional cook or chef being interviewed they will frequently talk about ‘failures’ they have experienced in the kitchen. I’ve had many, which I will happily share; once I left rice boiling on the stove for not one but TWO hours (needless to say my pan was almost incinerated), another time I served hard as a rock spaghetti (how you screw pasta up I don’t even know) and on a few occasions I have made cookies for my fiancée only to burn them to an absolute crisp. All these failures have been imperative to my cooking journey, however, as I have learnt vital lessons, such as which ingredients never ever go together and that you should always watch the stove and not walk away and get absorbed in another task. All invaluable experiences and not always common sense to all.

       The reason why I bring up this topic is that these 'Free from Refined Sugar cookies' were my third attempt at making gluten-free, dairy-free cookies from scratch. First I tried a chia & poppy seed combination which was basically tasteless (although my gorgeous fiancée ate them all). Secondly I baked a cacao orange dough which was extremely dry and inedible (again they were consumed in a few days by Chris). Third times the charm!   I hope you enjoy these two cookie recipes  

      And most importantly; don't sweat the failures in the kitchen. My beautiful friend Dani assured me after my second failed cookie attempt that the next batch would be a hit and it was. Keep experimenting with recipes and flavours - you will constantly be rewarded with new knowledge if not always edible dishes;)

      INGREDIENTS

      • 150g almond meal 
      • 100g Medjool dates, roughly chopped & pips removed 
      • 2 eggs, preferably free-range, lightly beaten 
      • 2 tablespoons organic maple syrup
      • 1 teaspoon gluten-free baking powder
      • 1 tablespoon coconut oil, in liquid form
      To make Date & Cinnamon cookies add:
      • 1 teaspoon ground cinnamon
      • 1 heaped tablespoon coconut flour 
      To make Date & Orange cookies add: 
      • 1 heaped teaspoon of finely grated orange zest
      • 3 tablespoons fresh orange juice 

      BAKING 

      1. Preheat a fan-forced oven to 160 degrees celsius. Line a large baking tray with baking paper. 

      2. Process the dates in a food processor until smooth. You may need to add a splash of water for the dates to obtain a smooth consistency. 

      3. Combine the almond meal and dates in a large bowl and mix well. Create a well in the middle of the bowl and pour in the remaining ingredients (the eggs, syrup, baking powder, oil, and either the cinnamon & coconut flour or the orange zest & juice) and stir with a wooden spoon to combine. 

      4. With wet hands handle 1 tablespoon of the cookie mixture and roll into a ball. Place the ball onto the tray and then gently press the back of a fork into the batter so that the dough becomes a circle. Continue this until no dough remains, making sure to place the cookies a few centimetres apart on the tray. Place the tray in the oven for around 30 minutes or until the outsides of the cookies are lightly golden. Remove from the oven and leave to cool on a wire rack before eating. 

      Makes / around 15 
      Total Preparation time / 10-15 minutes 
      Total Baking time / 30 minutes 

      x Emily 
      Related Posts Plugin for WordPress, Blogger...